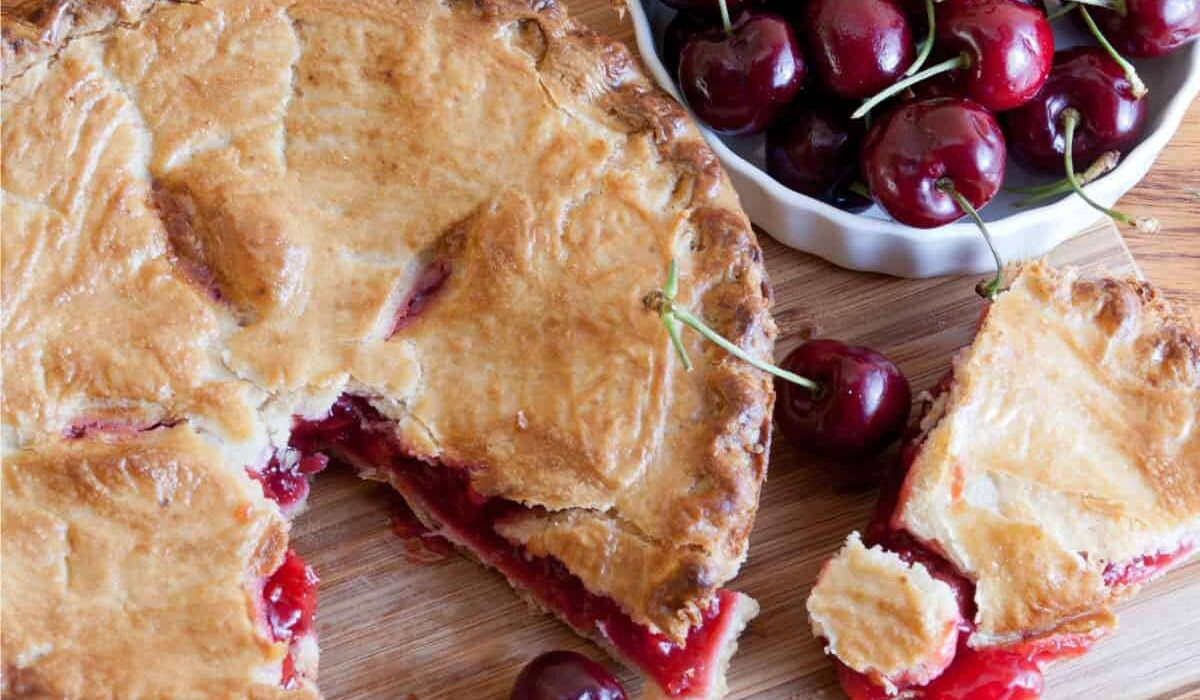
If you’re craving the ultimate homemade cherry pie, look no further. This easy Cherry Pie recipe delivers a flaky, buttery crust filled with juicy, sweet‐tart cherries and a perfectly glossy finish.
Why You’ll Love This Perfect Pie
- Timeless. Nothing says summer like a down-home cherry pie made with juicy, tart cherries.
- Easy. With a few simple steps (no fussy lattice work required) you’ll have a gorgeous pie in under an hour.
- Versatile. Swap in fresh, frozen, or canned cherries based on seasonality and pantry stock.
- Crowd-Pleaser. Sweet, tangy cherries bubbling under a golden crust are guaranteed to disappear fast.
Whether you’re celebrating the Fourth of July, hosting a backyard barbecue, or simply craving a slice of nostalgia, this cherry pie delivers old-fashioned comfort with every bite.
What Does Cherry Pie Taste Like?
A well-made cherry pie strikes the perfect balance of sweet and tart, with a flaky crust that frames the jammy filling. Fresh or frozen cherries work beautifully, and when you taste the first forkful, you’ll understand why cherry pie is a classic dessert for every occasion.
How Do You Keep The Bottom Crust From A Cherry Pie From Getting Soggy?
If you’re having trouble with a soggy bottom crust, here are three different things you can try to keep it nice and firm:
- Blind bake the crust. Roll it out, chill it, then par‐dock the dough, line it with parchment, fill with pie weights, and bake briefly to seal the starches before adding the filling.
- Next, you can create a moisture barrier by brushing the par‐baked shell with a thin coat of beaten egg white or melted chocolate, which sets into a waterproof layer when returned to the oven for a minute or two.
- Finally, make sure you thicken your cherry filling properly. Toss the fruit with enough cornstarch (or a touch of instant tapioca) and drain any excess juice before filling the shell.
For an extra guarantee of a well cooked crust, bake the pie on the lowest oven rack so that the bottom crust receives direct heat to finish crisping even as the fruit bubbles above.
Ingredients You’ll Need
For the Pie Crust
- All-purpose flour– Provides the structure and tender crumb that holds your pie together.
- Salt– Enhances the flavor of the dough and balances the sweetness.
- Sugar– Adds a hint of sweetness to round out the savory notes of the crust.
- Cold unsalted butter– Creates pockets of fat that melt during baking, yielding a flaky, layered crust.
- Ice water– Hydrates the flour just enough to bind the dough without warming the butter, ensuring maximum flakiness.
For The Cherry Pie Filling
- Fresh or frozen pitted cherries– The centerpiece of the pie: their natural sweetness and gentle tartness give the filling its characteristic flavor.
- Granulated sugar– Sweetens the cherries and helps draw out their juices.
- Cornstarch– Thickens those released juices into a glossy, jam-like consistency that won’t run.
- Lemon juice– Brightens the filling’s sweetness and balances the fruit’s natural tartness.
- Ground cinnamon– Imparts warm, aromatic depth for a subtly spiced profile.
- Salt– Rounds out the sweetness and enhances the cherries’ flavor.
To Finish
- Egg– Brushed atop the crust for a shiny, golden finish.
- Coarse sugar– Sprinkled on the egg-wash for a sparkly crunch and extra sweetness.
How To Make A Cherry Pie
- Prepare the Crust. In a large bowl, whisk flour, salt, and sugar. Cut in cold butter with a pastry cutter or two forks until mixture resembles coarse crumbs. Drizzle in ice water, 1 tbsp at a time, tossing until dough holds together. Divide into two discs, wrap in plastic, and chill 30 minutes.
- Make the Cherry Filling. In a saucepan over medium heat, combine cherries, sugar, cornstarch, lemon juice, cinnamon, and salt. Cook, stirring often, until mixture thickens and berries release their juices, about 5 minutes. Remove from heat and let cool slightly.
- Assemble the Pie. Preheat oven to 400°F. Roll out one dough disc on a floured surface into a 12″ circle and transfer to a 9″ pie plate. Pour in cherry filling. Roll out the second disc and lay it over the filling. Trim the excess crust, crimp edges to seal, and cut vents in the top. Brush with beaten egg and sprinkle coarse sugar.
- Bake. Bake 20 minutes at 400°F, then reduce to 350°F and bake an additional 25–30 minutes until crust is golden and filling bubbles. Let rest for at least 2 hours before slicing to allow filling to set.
Tips And Tricks
If you want a cherry pie that’s as beautiful as it is delicious, a few simple tips will help you achieve a perfectly flaky crust, jammy filling, and picture-perfect finish.
- Use cold ingredients. Keep butter and water ice-cold for a flaky crust.
- Don’t skip resting time. Let both the dough and the baked pie rest; this prevents shrinking and runny filling.
- Patch holes. Guard against bubbling over by placing a pie plate on the rack below.
- Adjust the sweetness. Taste your cherries first. Add more or less sugar to suit tart or sweet varieties.
Variations
Whether you’re craving extra texture, boozy warmth, or a twist on the classic, these variations will take your cherry pie to the next level:
- Lattice Top– Weave strips of dough over the filling for a classic look.
- Almond Scented– Add ½ tsp almond extract to the filling for a nutty nuance.
- Mixed Berry– Substitute half the cherries with blueberries or raspberries for color and complexity.
- Mini Hand Pies– Cut rounds of dough, fill, fold, and seal the edges for portable treats.
What To Enjoy With Cherry Pie
Cherry pie’s sweet‐tart brightness pairs beautifully with a variety of creamy, cooling, or spiced accompaniments to round out every bite:
- Vanilla Ice Cream– A classic contrast of cold creaminess melting into warm, jammy cherries.
- Whipped Cream– Lightly sweetened or boozy (a splash of bourbon!) for an airy finish.
- Sharp Cheddar Cheese– A thin slice of aged cheddar on the side brings savory balance and a delightful flavor pop.
- Espresso or Strong Coffee– The bittersweet depth of coffee cuts through the pie’s richness.
How Long Does It Last?
Properly stored, homemade cherry pie can be kept covered at room temperature for up to 2 days.
For longer storage, cover and refrigerate for up to 5 days, though the crust may lose some of its crispness. To make it taste straight out of the oven, warm slices in a 350°F oven for 5–10 minutes.
Can You Freeze It?
Yes! Freeze whole (well-wrapped) or individual slices in freezer-safe containers for up to 3 months.
Thaw your leftovers overnight in the fridge, then reheat in a 350°F oven for 10–15 minutes until warmed through and bubbly.
More Fruit-Filled Recipes
Pin It!
If you love this Cherry Pie recipe as much as we do, make sure you share it with your friends on Facebook and Instagram so they can try it too! Don’t forget to Pin it so you can make it again soon.
Cherry Pie Recipe | Traditional Cherry Pie
This easy Cherry Pie recipe delivers a flaky, buttery crust filled with juicy, sweet‐tart cherries and a perfectly glossy finish.
]]>
Prep Time: 15 minutes
Cook Time: 55 minutes
Allow to Cool: 2 hours
Total Time: 3 hours 10 minutes
Course: Desserts
Keyword: Cherry Pie, Cherry Pie Recipe, Homemade Cherry Pie
Servings: 8 servings
Calories: 461kcal
Click on highlighted ingredients or Equipment to see exactly what I use to make this recipe
Instructions
-
Prepare the Crust. In a large bowl, whisk flour, salt, and sugar. Cut in cold butter with a pastry cutter or two forks until mixture resembles coarse crumbs. Drizzle in ice water, 1 tbsp at a time, tossing until dough holds together. Divide into two discs, wrap in plastic, and chill 30 minutes.
-
Make the Cherry Filling. In a saucepan over medium heat, combine cherries, sugar, cornstarch, lemon juice, cinnamon, and salt. Cook, stirring often, until mixture thickens and berries release their juices, about 5 minutes. Remove from heat and let cool slightly.
-
Assemble the Pie. Preheat oven to 400°F. Roll out one dough disc on a floured surface into a 12″ circle and transfer to a 9″ pie plate. Pour in cherry filling. Roll out the second disc and lay it over the filling. Trim the excess crust, crimp edges to seal, and cut vents in the top. Brush with beaten egg and sprinkle coarse sugar.
-
Bake. Bake 20 minutes at 400°F, then reduce to 350°F and bake an additional 25–30 minutes until crust is golden and filling bubbles. Let rest for at least 2 hours before slicing to allow filling to set.
Get support & connect with our community on Facebook!
Nutrition
Calories: 461kcal | Carbohydrates: 57g | Protein: 6g | Fat: 24g | Fiber: 3g | Sugar: 23g
Tried this recipe?Follow @twosleevers and Pin it!