


If you’re a fan of bite-sized treats that combine the richness of cake with the fun of lollipops, get ready to learn how to make cake pops! In this recipe, we’ll show you how to create these irresistible sweet gems from scratch. You’ll love making and savoring these mini desserts that are perfect for any occasion.
Why You’ll Love Them
- Quick and Fun– Ready to enjoy in under an hour, making Cake Pops is a delightful baking adventure.
- Creative Outlet– Let your imagination run wild with endless decorating possibilities.
- Crowd-Pleaser– Loved by kids and adults alike, these adorable treats are a guaranteed hit.
- Portable Pleasure- Perfect for parties, picnics, or just a sweet snack on the go.
What Is A Cake Pop?
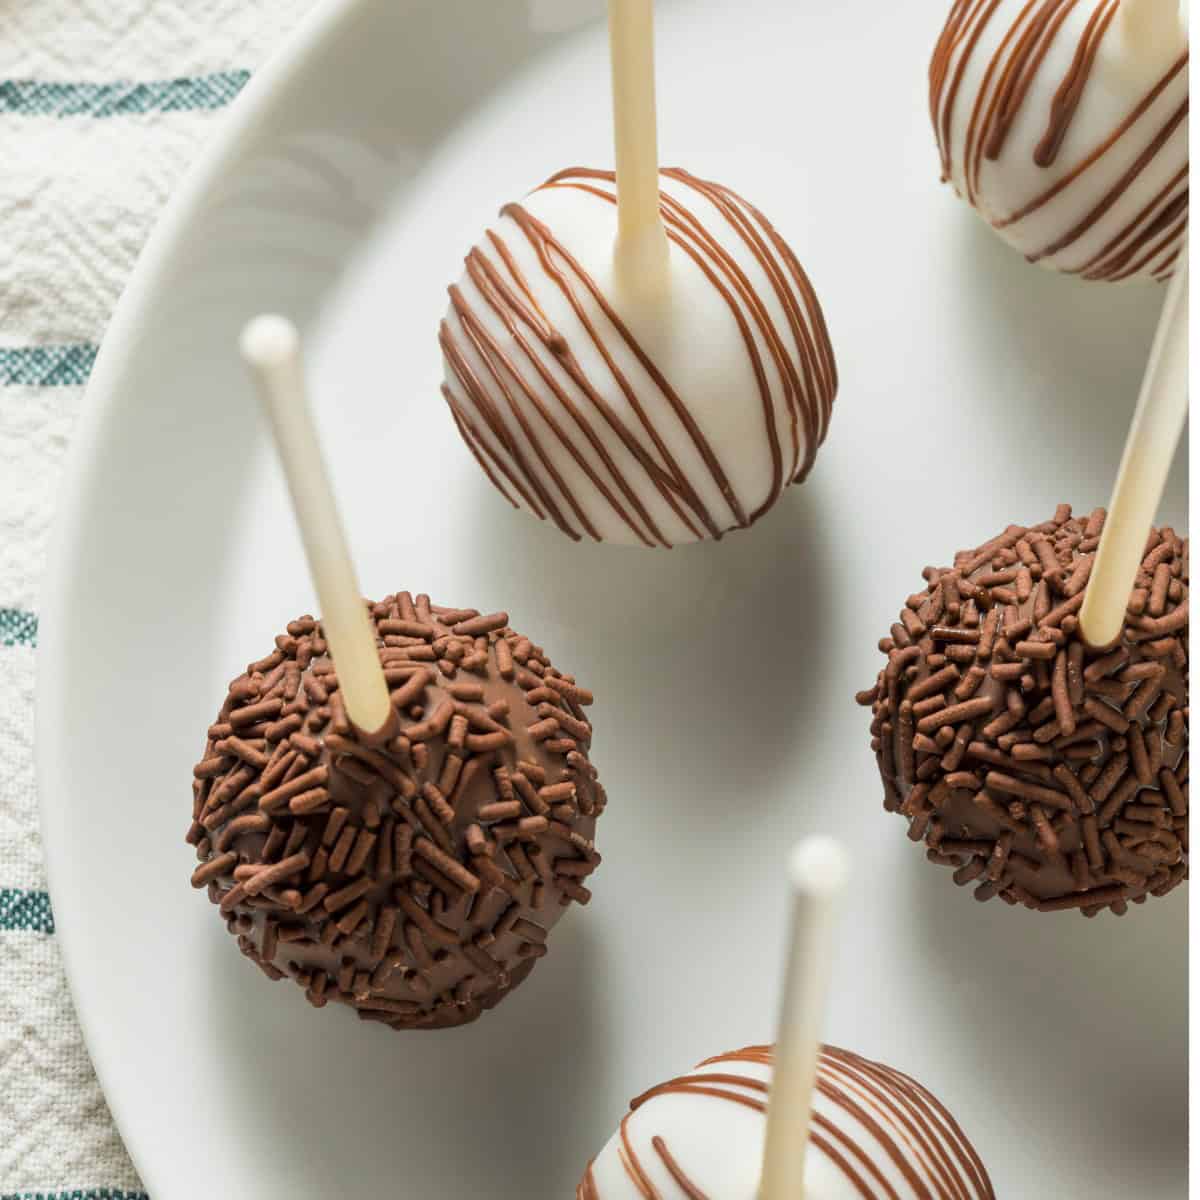
Cake Pops are a delightful blend of crumbled cake mixed with creamy frosting, coated in a layer of sweet candy melts and adorned with colorful decorations.
They’re a burst of flavor and texture in every bite, making them a delightful treat for anyone with a sweet tooth.
How Do You Get Cake Pops To Stick Together?
Getting cake pops to stick together involves a few key steps. Cake pops are essentially balls of cake and frosting, coated in candy melts or chocolate. Here’s a step-by-step guide to help ensure your cake pops hold together well:
- Bake and Crumble the Cake. Once the cake is fully baked and cooled, crumble it into fine crumbs using your hands or a food processor. The finer the crumbs, the better they will bind together.
- Mix with Frosting. Mix the frosting and cake crumbs together until you achieve a dough-like consistency. You want it to be moist enough to hold together when rolled into balls, but not overly wet.
- Chill. Place the cake pops on a baking sheet lined with parchment paper and refrigerate them for at least 15-30 minutes, or until they become firm. This chilling step helps the cake pops hold their shape.
- Coat with Candy Melts or Chocolate. Melt your candy melts or chocolate in a microwave-safe bowl, following the package instructions. This is typically done with your microwave on 50% power at 30 second intervals. Stir until smooth. Dip each cake pop into the melted coating, making sure it’s fully covered. Allow any excess coating to drip off.
How Do You Dip Cake Pops Without A Stick?
Dipping cake pops without a stick can be a bit tricky, but it’s definitely possible. Instead of using traditional lollipop sticks, you can use alternative methods to coat and enjoy your cake pops. Here’s how:
Toothpick Method
- Insert a toothpick into the center of the cake pop, making sure it’s stable.
- Dip the cake pop into the melted coating, rotating it for even coverage.
- Gently tap the toothpick against the edge of the bowl to remove excess coating.
- Place the dipped cake pop on parchment paper or a silicone mat to dry.
- Once the coating is set, you can remove the toothpick and cover the small hole with a decorative drizzle or additional coating.
Spoon Method
- Use a spoon to scoop up the melted coating.
- Hold the cake pop over the bowl and pour the coating over it, allowing the excess to drip off.
- Gently shake the cake pop to even out the coating.
- Place it on parchment paper or a silicone mat to dry.
No-Dip Method (Rolling)
- Instead of dipping, you can roll the cake pop in your melted coating.
- Place the cake pop on a fork or use your fingers to roll it in the coating until it’s covered.
- Let any excess coating drip off, and then transfer it to parchment paper or a silicone mat to set.
While these methods can work without traditional sticks, keep in mind that they may require a bit more patience and precision. Be careful when handling the cake pops to avoid smudging the coating or causing them to lose their shape. Once the coating is set, you can further decorate the cake pops as desired.
What Makes Cake Pops Fall Apart?
To prevent cake pops from falling apart, follow a well-tested recipe that provides the right ratio of cake crumbs to frosting. Properly chill the them before and after dipping, apply a thin and even layer of coating, and handle them gently throughout the process.
With attention to detail and practice, you can create cake pops that are not only delicious but also perfectly intact.
Ingredients You’ll Need
- Cake– Bake your favorite cake flavor, whether it’s chocolate, vanilla, or red velvet.
- Frosting– Choose a frosting that complements your cake flavor; cream cheese, buttercream, or chocolate ganache work beautifully.
- Candy Melts– These colorful, easy-to-melt wafers are used for coating the balls of cake.
- Lollipop Sticks– The “pop” part of the Cake Pop.
- Decorations– Sprinkles, chopped nuts, or drizzled chocolate for that finishing touch.
How To Make Cake Pops
- Prepare the Cake. Bake your cake according to the recipe instructions and let it cool completely. Once cool, crumble the cake into fine crumbs using your hands or a food processor.
- Mix with Frosting. Add your chosen frosting to the cake crumbs and mix until you have a dough-like consistency. This mixture will hold its shape when rolled into balls.
- Form Cake Balls. Roll the cake mixture into uniform-sized balls and place them on a baking sheet lined with parchment paper.
- Insert Sticks. Melt a small portion of your candy melts and dip the tip of each lollipop stick into the melted candy. Insert the coated end of the stick into a cake ball about halfway through. This will secure the sticks in place.
- Chill. Place them in the freezer for about 15 minutes to firm up.
- Melt Candy Melts. While the cake pops chill, melt your candy melts in a microwave-safe bowl, following the package instructions. This is typically done with your microwave on 50% power at 30-second intervals. Stir until smooth.
- Dip and Decorate. Dip each cake pop into the melted candy melts, covering it completely. Allow any excess to drip off. Immediately decorate with sprinkles, nuts, or drizzled chocolate while the candy coating is still wet.
- Set and Serve. Place the decorated cake pops upright in a cake pop stand or a block of foam to let the candy coating set. Once set, they’re ready to serve and enjoy!
Tips And Tricks
Making Homemade Cake Pops is a delightful experience, and here are some tips to ensure they turn out as cute and delicious as possible:
- Use Leftover Cake. They are a great way to use up leftover cake from previous celebrations.
- Don’t Overmix. When combining the cake crumbs and frosting, mix just until you achieve a dough-like consistency. Overmixing can result in a dense texture.
- Chill Before Dipping. Ensure your cake pops are well-chilled before dipping them into the candy melts. This helps the candy coating adhere properly.
- Rotate While Dipping. When dipping the balls of cake, gently rotate them to ensure an even coating and to prevent dripping.
Variations
Cake Pops are a canvas for your creativity. Here are some fun variations to try:
- Flavor Combos– Mix and match cake and frosting flavors for unique combinations like chocolate cake with peanut butter frosting or red velvet with cream cheese frosting.
- Themed– Create Cake Pops to match the theme of your event, whether it’s sports, holidays, or your favorite movie characters.
- Filling Surprise– Add a hidden surprise inside, like a mini candy or fruit filling.
What To Eat With Cake Pops
Cake Pops are delightful on their own but can be served with a variety of things to create a fun snack or relaxing tea time:
- Coffee or Tea- A classic pairing for a quick afternoon pick-me-up.
- Ice Cream- A scoop of your favorite ice cream alongside cake pops is pure indulgence.
- Milk– A glass of cold milk complements the sweetness of cake pops perfectly.
How Long Do They Last?
Cake Pops can be stored in an airtight container at room temperature for up to 3-4 days. If you want to store them for a longer period of time, you can refrigerate them for up to a week.
Can You Freeze Them?
Yes, you can freeze Cake Pops! Place them on a baking sheet in the freezer until they’re firm, then transfer them to an airtight container or freezer bag. They can be frozen for up to 2-3 months.
More Delicious Desserts
Pin It!
If you loved learning how to make cake pops as much as we did, make sure you share the recipe with your friends on Facebook and Pinterest so they can try it too! Don’t forget to Pin it so you can make them again soon.
How To Make Cake Pops | Copycat Starbucks Cake Pops
If you’re a fan of bite-sized treats that combine the richness of cake with the fun of lollipops, get ready to learn how to make cake pops!
]]>
Prep Time: 15 minutes
Cook Time: 30 minutes
Freeze: 15 minutes
Total Time: 1 hour
Course: Desserts, Snacks
Cuisine: American
Keyword: Cake Pop Recipe, Cake Pops, Copycat Starbucks Cake Pops, Homemade Cake Pops
Servings: 30 cake pops
Click on highlighted ingredients or Equipment to see exactly what I use to make this recipe
Instructions
-
Prepare the Cake. Bake your boxed cake mix according to the recipe instructions and let it cool completely. Once cool, crumble the cake into fine crumbs using your hands or a food processor.
-
Mix with Frosting. Add your chosen frosting to the cake crumbs and mix until you have a dough-like consistency. This mixture will hold its shape when rolled into balls.
-
Form Cake Balls. Roll the cake mixture into uniform-sized balls and place them on a baking sheet lined with parchment paper.
-
Insert Sticks. Melt a small portion of your candy melts and dip the tip of each lollipop stick into the melted candy. Insert the coated end of the stick into a cake ball about halfway through. This will secure the sticks in place.
-
Chill. Place them in the freezer for about 15 minutes to firm up.
-
Melt Candy Melts. While the cake pops chill, melt your candy melts in a microwave-safe bowl, following the package instructions. This is typically done with your microwave on 50% power at 30-second intervals. Stir until smooth.
-
Dip and Decorate. Dip each cake pop into the melted candy melts, covering it completely. Allow any excess to drip off. Immediately decorate with sprinkles, nuts, or drizzled chocolate while the candy coating is still wet.
-
Set and Serve. Place the decorated cake pops upright in a cake pop stand or a block of foam to let the candy coating set. Once set, they’re ready to serve and enjoy!
Get support & connect with our community on Facebook!
Tried this recipe?Follow @twosleevers and Pin it!

Leave feedback about this